Home » Dutch Tool Box (Page 2)
Category Archives: Dutch Tool Box
The Waiting Game
I had several goals in mind when I entered my garage yesterday afternoon to continue making my Dutch Tool Box: chop out the notches for the fall-front catch, make and attach the two boards for the front of box, make the tool rack for the top compartment, and get the lid and fall front cut to rough size. It sounds like a lot of work but it really wasn’t at all, until you tack on the time spent waiting for glue to dry. I am using decorative cut nails on this box, just like my other chest, but because this box will definitely be painted, and I want those nails to be seen, I don’t want to add them only to be painted over. This led to somewhat of a tricky situation when it came to attaching some of the pieces that would usually be held on with some type of mechanical fastener, but more on that later.
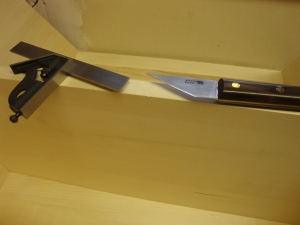
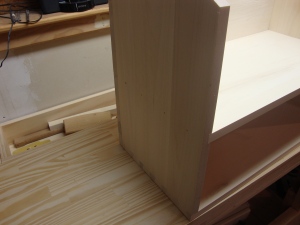
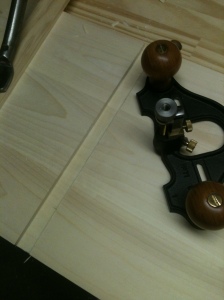
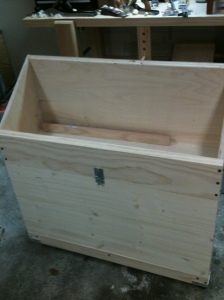
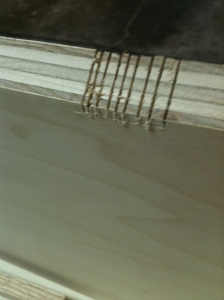
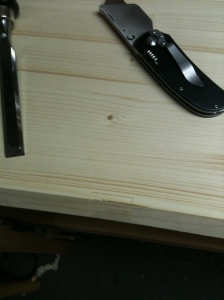
The first thing I did yesterday was notch out the spaces that would accept the removable catch for the fall front. For that catch I am using a two inch wide x 1/4″ thick piece of oak. I laid out the two notches in the center of the chest using a combination square and a marking knife, just a bit wider than the actual catch. The first notch was easy, I struck lines, sawed the kerfs in with a carcase saw, and chiseled them out. I then finished it off with the router plane. The second notch was only slightly more tricky, as it is “half blind”. I did not use a saw this time, only the striking knife and a chisel, but it was finished nearly as quickly. Once again I used the router plane to clean up the mortise.
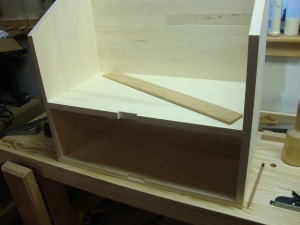
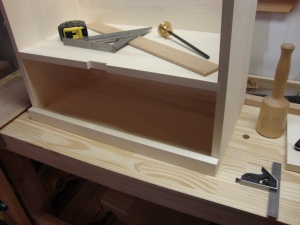
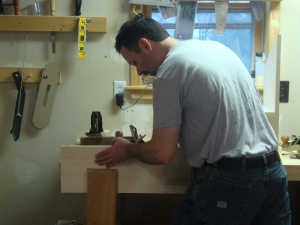
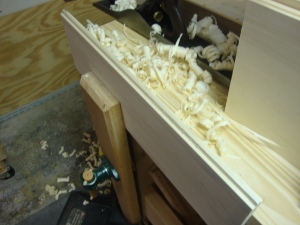
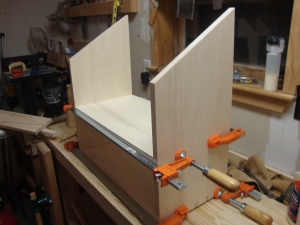
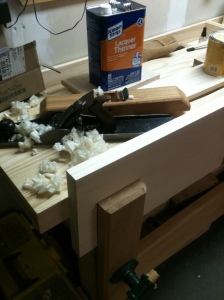
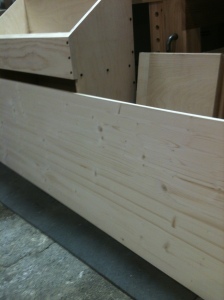
The next task was adding the bottom board which would cover the half blind notch. I ripped it to width, 1 1/2″, removed the saw marks with my jointer plane, and attached it with some glue. Clamping a small board can be difficult because the glue lubricates it and makes it want to slide all over the place once any clamp pressure is applied. To counteract that, I used a trick that I used at my former job for gluing dyes. Rather than clamping it immediately after applying the glue, I let it set in place for a few minutes to give the glue time to tack up. In about five minutes the glue was set just enough to add clamping pressure without it sliding out of place. While it dried I cut the front panel to size and added the bevel to match the angle of the box. I made the width slightly over sized and planed it down with the jointer for a perfect fit. I didn’t attach it just yet, though, as I wanted to get the tool rack sized before I added the front.
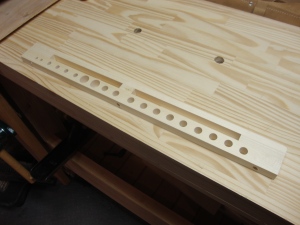
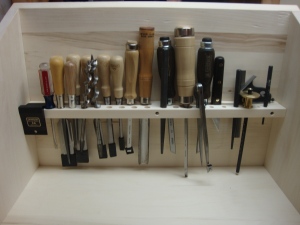
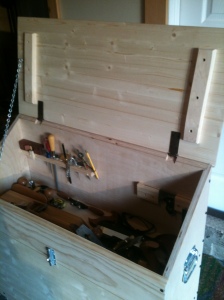
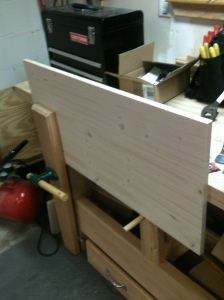
To make the tool rack I used some scrap Poplar I had laying around the garage. I decided on a two rowed rack, with the back row being slots for chisels and such, and the front a row of round holes for files, marking tools, and setting tools. To make the holes I used my drill press, which is a tool I don’t talk about much because I don’t use it much. It was given to me as a gift, but the truth is the only time I really use it is for sanding. For the rack, half of the holes I made with a 1/2 inch forstner bit, I then varied the rest using 3/4 inch and 1/4 inch for some of the smaller tools. I assembled it, glued it up, and clamped it to my bench. The problem here is that I could do little else until the rack was installed, so I was forced to wait a few hours for it to dry. In the meanwhile, I cut the lid panel to rough size as well as the fall front, then watched football. Once the tool rack dried, I planed it all flush and smooth, and temporarily attached it to the box, laying the box on it’s back and adjusting and readjusting the height using some of my tools as a guide. Once I settled on a height that I liked, I attached it with some screws. Everything seemed to be great, so I removed the rack and it promptly developed an ugly split nearly dead in the center. I should have known better than to use a hardwood, even if it was just poplar. Every tool rack I’ve tried to make from a hardwood ended up splitting, and that includes oak and maple. Those woods are certainly hard and dense, but it seems that when you bore holes into them the become brittle as matchsticks. At least I have the size and layout that I want, and a nice piece of pine that should do the job just fine. Nonetheless, it was a lot of time wasted.
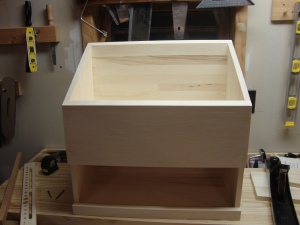
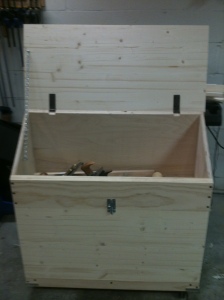
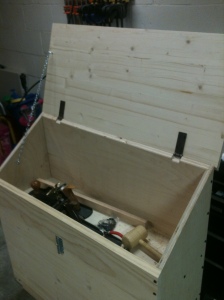
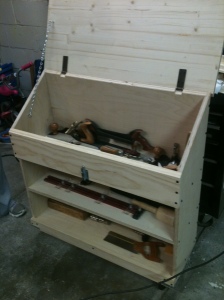
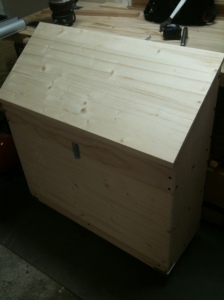
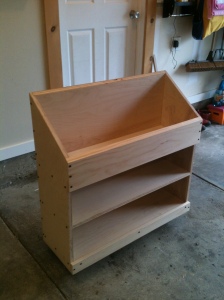
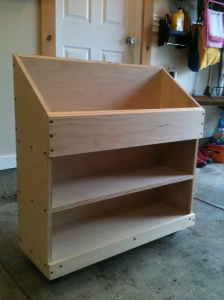
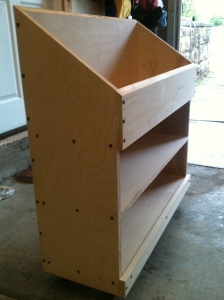
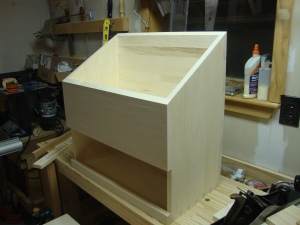
The last job of the day was attaching the front panel to the top compartment. I had already cut it and sized it, so I only had to apply the glue and clamp it up. I left the front panel dry overnight and removed the clamps this morning before I went to work; everything looked okay. So now all I have left to do is fit the fall front, fit the lid and add a decorative edge to it, and make a few cleats. Of course, I also have to make a new tool rack, but that shouldn’t take long. I’m estimating just a few hours of work left until it is ready for paint. So in a time span of around four hours, I only spent a little more than one of those hours actually woodworking; the rest of the time was spent waiting for things to dry. It wasn’t a terribly exciting day for me. Even the split tool rack didn’t stir me much, as it seemed a bit flimsy anyway. But I’m in the homestretch now, and the chest looks almost finished. That is a good thing, because as much as I am enjoying taking my time on this one, I’m that anxious to get the next project up and running.
I messed up again
While I love the dovetail joint, I’ve never been a big fan of the half-dovetailed carcase. My theory is: if it’s a full box, dovetail it; if it’s a half a box, dado it. I am not implying that the dado joint is stronger than the dovetails, nor am I saying that it looks all that great, but the dado method, if done correctly, is much a much easier path to square construction than trying to combine it with dovetailed joinery. Surely, this would not affect a more experienced woodworker than myself, but no matter who you are, this method forces you to measure, and that measuring part easily leads to inaccuracy, which is also where I found another mistake I made.
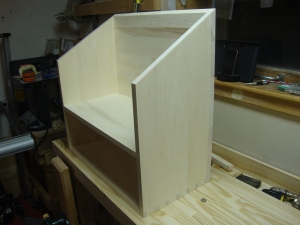
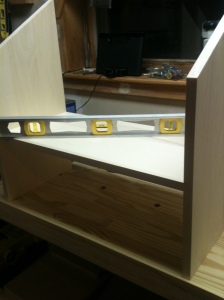
When I did the dry fit of my Dutch tool box, I assembled the two dovetailed sides to the bottom board and made sure they were square, measured the length of the shelf that would fit into the dados I had sawn into the sides, and cross cut that board to size. Theoretically, with my bottom/pin board being 23 1/2″ wide, and my dados each 1/4″ deep, I should have had a 22 1/2″ long shelf. When I did my measuring, I came up about an eighth short of that. I checked it and double checked it, but the results were still the same. So with that my cut measured 22 3/8″. I didn’t take into account the fact that the case was only dry assembled and not clamped. I also didn’t take into account the fact that mathematics never lie. Anyway, the other day when I glued and assembled the case and checked the diagonals for square I ended up with a case 1/16″ out of square. I could live with that, so I applied a few more clamps and left it dry. Today, I thought nothing of it and flipped the case over to measure for the back boards, which in theory should all have been 23 1/2″. They weren’t. Oh, at the bottom they were, but at the top they tapered all the way down to 23 1/4″. A little taper is understandable, as the top is basically unsupported and doesn’t have a dado to hold it square, but that gap was alarming. I once again measured the diagonals for square and found that the case was 3/16″ off the mark. That explained my taper, but not why it was so crooked. I then remembered my shelf, which I cut 1/8″ shorter than the theoretical math told me to cut it, and that solved my riddle. Though I took a little comfort that my detective work paid off, it didn’t make me feel any better about a crooked case. Nonetheless, I soldiered on and continued my project.
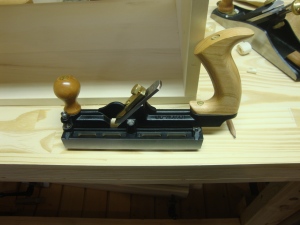
The first thing I did was plane all the edges flush with each other, which was thankfully very easy because they were all pretty much flush to begin with. I then proceeded to crosscut the boards to width for the back panel. Because the case tapered as it got higher, I had to scribe each board to fit. I used the back-left side as my reference, scribed each board, and set the table saw miter gauge about two degrees off ninety. I had the boards sawn quickly. The next step was to add the tongue and groove joints to the back boards. and the Lie Nielsen #48 was the tool I used. Being that this was only the second time I used it, I promptly messed up the first joint. Still, I got the hang of it quickly, and while my joints weren’t perfect, they were surely close enough, and in about thirty minutes I had the back panel joinery finished.
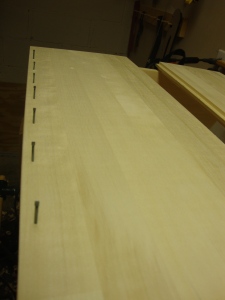
It then came time to attach the back panel, and for that I used cut nails and no glue, and also made yet another mistake. Rather than use the large cut nails I had purchased just for an operation such as this, I decided that the cut brads would do just fine. I used the marking gauge to scribe a nail line, and predrilled all the holes. After hammering all the brads in, it just didn’t seem like enough. I decided to add two screws at the top of the case, where there would be more stress between the side and back panels. That seemed to make it much tighter, but I wasn’t satisfied. Rather than drive my self crazy by leaving it the way it was, and always wondering if the brads would be enough, I pre-drilled some more holes and added sixteen more cut nails, but this time using the larger ones I had used on the back of my original tool chest. These left no doubt in my mind, and while the back of the chest has around thirty more nails than it needs, they don’t look bad, and I’m not worried about the back panels falling off anymore.
To close out the day I gave the entire outside of the case a light sanding just at 60 grit. I also planed the top bevel with just a few passes of the smoother to clean it up. Once the first sanding was done, I placed the chest on my workbench for the night. I started to examine it a little, and for all of my errors and miscues, it actually looks really good. In fact, it’s starting to look great. Sure, it is a little crooked, and the back has enough nails to build a small shed, but the lines are clean, the dovetails look nice, and the wood is nice and clear. Even with mistake after mistake I am managing to make a pretty nice little tool box. Who knew? Just imagine what I could build if I knew what I was doing…
I messed up.
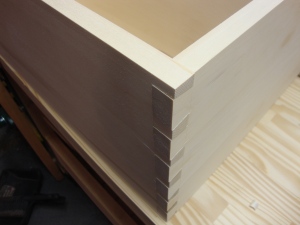
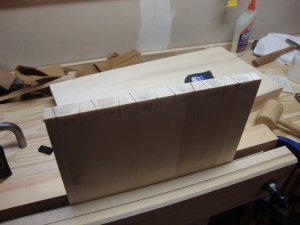
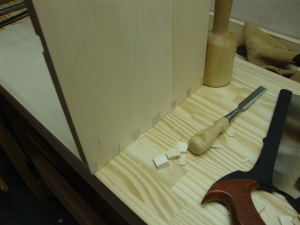
I committed two grievous errors in the continued construction of my tool box today. The first was an error of time. I had estimated that it would take roughly 90 minutes to get the dovetails sawn and fitted as well as getting the case glued up. I was wrong, dead wrong. The actual time was more like 3 hours. The good news is that the dovetails turned out fine. They are not the best dovetails I’ve ever sawn, but they are hardly the worst. In fact, this was the first fairly large dovetailing operation I’ve done in more than a year, a total of twelve tails and the corresponding pins. That doesn’t sound like a whole lot when it comes down to it, but that is a lot of sawing, chiseling, chopping, and fitting.
My estimating error, while a big mistake, didn’t do anything but set my time-frame back. As I said in my last post, I’m not in any kind of rush to get this finished, but I like to gauge how long certain jobs will take during a project, and most of the time I am close to the mark. The second error of the day was much more of a problem.
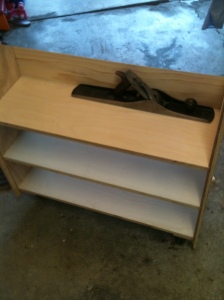
When I came up with the dimensions for this chest, I used my hand planes as a guideline for the length and the tool rack as a guide for the depth of the top compartment. I carefully laid out my planes on my workbench, arranged and measured them, and used that number to come up with a length for the shelves. That is exactly how I did it for my large chest, and it worked out just fine. The exception on this occasion was my #7 jointer plane, which I had taken apart to clean and sharpen last week, and which I didn’t have reassembled when I crosscut the shelves to length, and which I forgot to consider when I did that crosscutting. So after I cut the pins, marked for the tails, dry fit everything together, and then went ahead and did the glue-up, I noticed my jointer plane sitting on top of my tool cart. On a whim, I placed it in the assembled box, and found that the box is about 1/2″ too short to hold the plane. So this tool box will not hold my jointer plane, and no box stretcher in the world will change that fact.
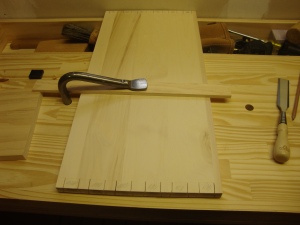
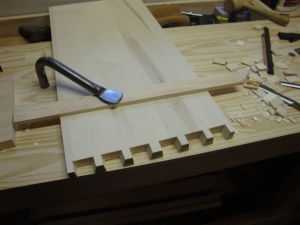
Regardless of my boneheaded mistake, the toolbox is coming along nicely. I finished the most time consuming section of the project today, and the rest of the build should be a relative piece of cake. At least I remembered to pre-drill the dados from the inside for the cut nails, which will be both decorative and functional. I will probably not be doing any more work for the rest of the week. We are expecting an arctic level cold front to arrive tomorrow, with temperatures below zero. My little space heaters will not be able to keep up with those temperatures, and neither will my back. I believe the weather is supposed to even out towards the end of the week, so I will get working again hopefully on Friday, and that should mean finishing both the front and back panels, leaving only the lid to complete the toolbox proper.
My blunder is pretty upsetting, because I had very high hopes for this tool box, and I guess I still do. The bright side is that it should hold all of my other woodworking tools with no problems. The other good news is that I have been using my wooden try plane much more anyway, and maybe this will be the excuse to continue using it and maybe even sell my Stanley. With the extra space the Stanley would have taken up, I could always fill it with another shop made plane or two. Making a shop made plane could also help me pass the time between now and nicer weather. I actually have a few ideas already in the hopper. So maybe, just maybe, my mess-up will open up a new door and level of woodworking for me. Maybe my accident wasn’t even an accident…
That was easy.
Yesterday, New Year’s Day, I decided to get started on the right track and celebrate the day with a little bit of woodworking, and that meant getting my new Dutch tool box started. Of course, it is freezing in my area, and with it snowing as I type this post, with temperatures expected to dip down close to 0 degrees F, it’s not going to get much better, so yesterday I thought ahead and set a space heater in the garage to warm it up before I got started. Even with all of my preparations, the garage was still a little uncomfortable, and my very stable Aspen still warped a touch. It wasn’t such a big deal, but when I ripped the stock down to rough width on the table saw, it left the edges out of square corresponding to the slight bow in the board. You wouldn’t think that something so minor would be very noticeable, and usually it isn’t, but I needed to have those boards perfectly square in order to dovetail them correctly, so I knew that I would have some work ahead of me.
The first thing I did was to rip the boards to width. I was aiming for 11 1/4 inches wide, so I set the fence 1/8 wider to give me some wiggle room to not only plane off the tooling marks, but also to square up the edges. I ripped the panel into two equal pieces, and then crosscut them to just under 24 inches. With that out of the way I chose two boards to use as the side panels, with the others set aside for the bottom and the shelf. I picked the clearest boards for the side panels, sandwiched them together, and placed them in the leg vice to plane off the tooling marks and square them up. For that job, I used my jointer plane to get it flat, and I smoothed the edge with the wood try plane I made last summer. Shockingly, I had both sides finished in just a few minutes, so I repeated the same thing with the other boards I had set aside. Originally, that was all I had planned on doing, but since things were going so quickly I decided to move onto sawing the angles on the side panels.
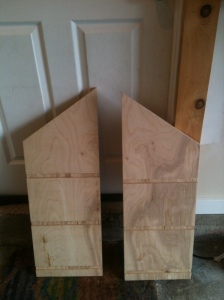
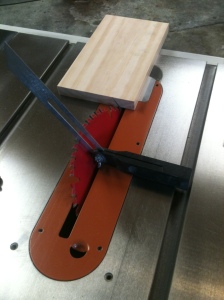
To saw the angle for the front lid, I used the table saw and miter gauge. Rather than sawing each angle individually, I once again sandwiched the two boards together, set the miter gauge at 30 degrees, and sawed both angles at once. My saw blade is fairly new and very sharp, so it still produces a nice, clean cut, especially when cross-cutting. In just a few moments the angles were finished, so while I was still rolling along I decided that I may as well saw the dados to hold the shelf.
To saw the dados I again turned to the table saw and cross cut fence, but I used a dado stack rather than nibble away at the joint piecemeal. My luck was holding up yesterday, because it took only two test cuts to get the dado perfect, with only one extra shim added to my first attempt to get the fit I wanted. I had both dados finished in no time, so I brought the two boards over to the workbench to clean up the dados with my router plane. I have two things to report: First, using a router plane with a newly sharpened iron is a joy, and even across the grain it produced a perfectly clean and smooth bottom to the dado. The second thing is even better: This is the first project I’ve attempted since the tool tray was added to my workbench, and I’m happy to say that there was absolutely no change in how I worked. In fact, I honestly forgot for a moment that the tray was even there. The tray did collect a few shavings, I admit, and I had them vacuumed up in about ten seconds. Otherwise, my bench performed just fine, though I definitely need to add a few more dog holes for versatility, as my short row of four holes forced me to work in one spot. In any event, I had both dados cleaned up and ready to go quickly and easily.
With the dados cleaned up and everything fitting nicely, I decided to call it a night as far as the tool box was concerned. All in all, I was really impressed, and happy, with how quickly everything went together. I was so far ahead of schedule that I decided to sharpen both my jointer plane iron and the iron for my wood try plane, just to see if I could frustrate myself a little. The only downside to yesterday turned out to be when I sharpened the jointer, and I came to the realization that my jointer iron, which is more than 100 years old, is probably going to need replacing sooner rather than later. I estimate that I can sharpen it maybe a dozen or so more times before it needs to be reground, and there really isn’t much iron left for that operation. So I may be ordering a new iron from Hock in the next few months. But all in all it was a good day woodworking, and it occurred to me that once I get the dovetails sawn and fitted, the bulk of this project will be finished. I estimate that it should take around an hour to get it all done, and then I can glue it up and go from there.
The other really good news is that I am taking my time on this one, mostly because I have the time to take. I have no new projects on the horizon, mainly because it is going to be too cold to really begin any project of depth. So I am going to really go at an easy pace, not because I have the time, but also to fuss over the little details. I’ve been doing everything out of my head without a drawing, plan, or cutlist, though I took the dimensions roughly from the plans in Popular Woodworking magazine. No offense to those plans, but they are too ambiguous, and once I decided on the size, I didn’t even bother to look at them anymore.
I will continue the project on Sunday morning, and I should be able to have it glued up and ready to go in just a few hours. In the meanwhile, Lee Valley is currently offering a free shipping event so I will order the hinges from them once again. I am guessing that by the time they arrive the tool box will be ready to receive them. With that, it is already looking like a happy New Year.
Dutch Tool Box
Finally, after what seemed like an eternity, I’ve picked up some of the material for my next project. I’ve decided to once again make a Dutch Tool Chest. For those of you who don’t know, the Dutch chest is an old design which has appeared in several books on tool chests, the Woodwright’s Shop, and more recently in Popular Woodworking Magazine. Back in the summer I completed a chest based off of the Dutch design and I thought it turned out nicely. In fact, when I posted the photo to Lumberjocks it made it to the Daily Top 3 projects page, which I thought was quite generous of them. I went to my local Lowes and picked up two 1x12x8 poplar boards, which should give me enough material to build the entire chest case except for the lid. Because I am still not feeling all that well, I probably won’t get started until next weekend, but at least I am at the starting gate.
Some may wonder why I am building another tool chest. Well, I consider this next project more of a tool box rather than a tool chest. But the main reason is that the chest I built back in the summer is enormous; it is the Titanic of tool chests. There is enough room in it for every woodworking hand tool I own times two. While I really like the chest, a lot, I am trying to scale back everything in my garage, which is getting smaller and smaller by the day, even though I’ve done my best to pare away at anything unnecessary. It seems the more that I do that, the more stuff my wife finds to toss in there. I think my current chest will end up in my dad’s garage and the new tool box will end up on a small platform under the right side of my workbench.
Another added benefit of building this tool box will be the chance to practice sawing dovetails, as well as finally use my new tongue and groove plane. I will stick fairly closely to the plans in Popular Woodworking magazine, though I will change some of the dimensions to fit my needs. I will once again use the decorative cut nails, which I thought added a nice touch, and had never seen a tool chest with that look before. Some people later on did the same, which I thought was pretty cool, but only a few acknowledged that I had come up with the idea. Maybe I didn’t come up with the idea originally, or maybe some who did it had come up with it on their own just like I had, but I know at least one instance where I was snubbed, not that I care in the least, honestly. But it was the person doing the snubbing that bothered me.
So tomorrow I may start by getting my material cut to length. Like I was saying, I am not feeling well so I don’t see myself doing anything major; my head is currently too fuzzy for that. Once I get going, I estimate that it will take roughly two weekends to get the chest case built, and another weekend day to get the accessories added. I’m not sure on the finish, and on projects like this I don’t like to think too far ahead. I may leave it unfinished and just add a few coats of wax, or I may paint it. Either way it doesn’t matter, because I will be woodworking again really soon, and that is a good thing.
Is that a tool chest, or a dog house? Or, Patriot’s Tool Chest finished.
Last night after work I sprinted into the garage to get the lid and front panel of my Patriot’s Tool Chest cut and fitted. I wasn’t really in a rush, but it’s been raining for two days here, and though the humidity levels are ridiculous, the temperature was warm but not so hot as to make it unbearable for me to woodwork. I started with the front panel, and like always, I crosscut the board to length a bit oversized on my table saw with a cross cut sled. I then ripped the panel to width, also a bit oversized, and used hand planes to trim it to a nice fit, the jack plane at first and the jointer plane to finish it off. I then crosscut it to final size on the table saw. Finally, I attached the simple latch to hold the front panel to the chest. I only need to add two small blocks to the bottom of the lid to keep it from popping out. All in all constructing the front panel only took around fifteen minutes.
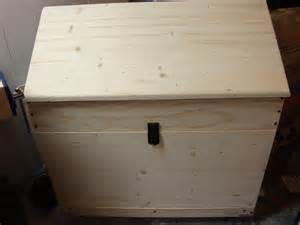
The lid cut and fit was not much more difficult, with the only difference being the bevel angle I needed to cut to match the chest angle. Once that was finished I set the lid on top of the chest, and the disturbing image of this much heralded chest design looking quite like a doghouse sawed neatly down the middle came to mind. I half expected Snoopy to come strolling through the garage door, hop up onto the chest, and fly off to fight the Red Baron. In fact, a little while later my daughter wandered into the garage, probably because my wife asked her to check up on me, and when I told her the chest looked like a dog house she started to laugh uncontrollably.
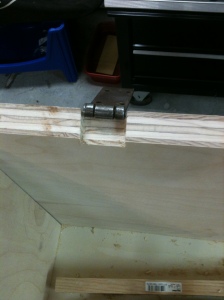
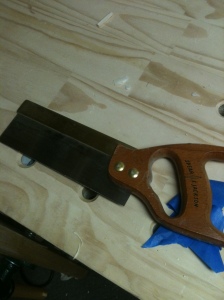
In the meanwhile, because the lid and panel were cut and fit so quickly, I decided to install the hinges. I knew that this would be the most challenging part of the build, not because hinges are all that hard to install, but because of the way the angles of the chest and lid met; there really wasn’t a place to set the lid easily and do any layout. The first thing I did was temporarily attach the hinges and use a utility knife to mark the location. I then used my trusty Spear & Jackson backsaw, my first real woodworking saw, to saw kerfs into the plywood. I tried to pare away the kerfs with a sharp chisel but the plywood wasn’t cooperating, so I dusted off my electric router and used that instead. The next task was cutting out some small notches on the lid itself to give the hinge pin a place to set. So like before, I temporarily set the lid in place, and marked the location with a utility knife. The paring here was much, much easier; my chisel was razor sharp and Spruce works very easily. I can now understand why White Spruce is used in building log cabins. I then attached the lid with a temporary hinge, masking tape, and called my wife in to hold the lid in place as I fastened it. The fit isn’t perfect but it is definitely close enough, and the lid closes nicely with no gaps. Last thing I did was attach a few eye hooks and some jack chain to keep the lid from falling all the way back.
For all intents and purposes the chest is now finished. I still am going to make a saw till, and a small tool rack, but those are simple to make and install. I placed most of my hand tools in the chest just to see how I fared and I wasn’t disappointed. Even without any dividers or racks there is plenty of space with plenty of room to spare for any future expansion. Even if the chest looks like a dog house split down the middle it does a good job. I’ll admit that maybe my proportions and not the design are more the reason that this chest looks like a Hollandse Herdershond should be residing in it rather than my tools. The real truth is that I’m not overly impressed with making shop projects; I don’t get the satisfaction from them that some do, though I do enjoy traditional tool boxes/totes. Later today, or tomorrow, I will attach some handles to the sides of the chest, nothing fancy. If I were commissioned to build this, or if it was being featured in a magazine, I probably would have gone all out with fancy wood, joinery, and some even fancier hardware. The way I built this project could be done by nearly any woodworker with a decent table saw, a few hand tools, and the ability to do a little lay out and accurate measuring. All in all it was a pretty fun project, and it does the job of holding my tools exactly how I want it done. The only thing left to do is to decide on the finish. The red, white, and blue color scheme keeps coming to mind for the lid, or at least the star made famous by Captain America. Still, I could always paint the whole chest bright red and call it ‘The Snoopy Tool Chest’.
![IMG_1248[1]](https://confusedwoodworker.files.wordpress.com/2013/07/img_12481.jpg?w=225&h=300)
Patriot’s Tool Chest Day 2
I hit the garage early this morning to do a little more work on my Patriot’s Tool Chest. Fittingly, today is Independence Day here in America, and that doesn’t mean the day when we fought off an army of extra-terrestrial space cruisers, but when for all intents and purposes, The United States of America decided that it would be a good idea if we governed our own affairs and that those doing the governing would be answerable to the people, and not the other way around. Just yesterday my daughter asked me what ‘Independence Day’ meant. I did my best to explain that here in the United States we were once governed by another country, and in that country what mattered more than anything was how much money you had and to whom you were born. Our founding fathers decided that here in America, no matter who you are, how much you are worth, and who your parents were, your voice and vote are equal to the richest man in your state, and even the poorest of families has a chance to succeed if they work hard. Maybe in today’s world that is nothing more than rank idealism, but it was such a beautiful sentiment that I nearly teared-up as I was telling her. In any event, in my own small way I honored our day by woodworking, and remembering that I have this privilege because of the great country that I live in.
My time in the garage this morning was brief. I wanted to get the back panel of the chest installed and ready for the lid hardware, which should arrive tomorrow. At first I was going to rip the plywood into three separate pieces and use tongue and groove joints, but I felt it was completely silly to rip a perfectly good, and wide, piece of plywood in half just to put it back together again. So I cross-cut the wider sheet to length, and marked the lid angle with the bevel-gauge. I then cut the bevel angle on the table saw and installed it to test the cut. The fit was perfect, so I placed the case on the ground and marked the sheet to width. I wanted the first sheet to stop half-way between the middle shelf. I quickly got that piece ripped to width on the table saw, and I sawed the bottom sheet to length and width to finish off the back.
Before I did any installation, I sanded both sheets: coarse, medium, and fine again. I made the smart decision to hook the shop vac to the dust port of my sander and that helped a great deal because it was already hot and sticky in my garage at 8am. I installed the sheets to the back of the case using glue, and finish cut nails, 1 1/2″ in length. I of course pre-drilled each hole, and the cut nails installed brilliantly. Again, I cannot stress enough how great they have worked out on every project I’ve used them on. I also used the decorative head cut nails to fasten the tool chests’ back to the sides. I used a somewhat symmetrical pattern, but not so much so where it looks like it was completely planned out. I want it to appear somewhat random.
With the back installed the chest seems much larger. In fact, the top compartment is cavernous, and I have no doubt it will easily hold everything I had planned on putting there and then some. The only major components left to finish are the glue ups for the lid and front panel. I will also have to saw out a few notches in the middle shelf so the cleats on the front panel will have a place to sit. The glue ups should go easily enough. The only thing left to do that is remotely difficult will be installing the hinges to the lid, and I cannot imagine that being very difficult. I also re-adjusted the casters for about the 5th time; once the back panels were installed the chest was a little tippy. All in all I spent just over an hour on today’s tasks. I’m still withholding any judgments until the case is finished. With the installation of the back panels the case looks a little more refined and not so much like a plastic tool cart made out of wood. I think more than anything the lid will set this chest apart; so I promise not that despair until the lid and front panel is installed. But, so far so good.
We hold these truths to be self-evident, that all men are created equal, that they are endowed by their Creator with certain unalienable rights, that among these are life, liberty and the pursuit of happiness. That to secure these rights, governments are instituted among men, deriving their just powers from the consent of the governed. That whenever any form of government becomes destructive to these ends, it is the right of the people to alter or to abolish it, and to institute new government, laying its foundation on such principles and organizing its powers in such form, as to them shall seem most likely to effect their safety and happiness. Prudence, indeed, will dictate that governments long established should not be changed for light and transient causes; and accordingly all experience hath shown that mankind are more disposed to suffer, while evils are sufferable, than to right themselves by abolishing the forms to which they are accustomed. But when a long train of abuses and usurpations, pursuing invariably the same object evinces a design to reduce them under absolute despotism, it is their right, it is their duty, to throw off such government, and to provide new guards for their future security.
Patriot’s Tool Chest Build Begins
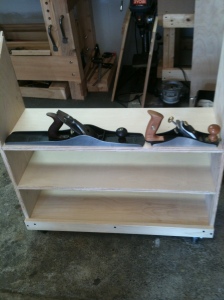
I went into my garage yesterday afternoon with the goal of building the case of my Patriot’s Tool Chest. I had about four hours of time set aside, and with the case being the most time consuming part of the build I knew that getting it finished in one afternoon would lead to a much easier time on the rest of the project. I also had another motive. Though I have some time off from work for the next few days, we are expecting some very hot and humid weather, and the last thing I want to do is spend time in my garage when it’s hot and humid. So for the past few days I’ve been drawing detailed lay outs of the dados and case sides, which is something I don’t normally do, but I wanted everything ready to go so I could hit the ground running. I also made a few design modifications, making the case a few inches wider so I could place my jointer and smooth plane back to back, and making the first shelf a bit deeper so any of my bench planes could sit up against the edge of the case and not interfere with the lid closing.
First thing I did was lay out the dados and lid angle on the plywood. That went very quickly because I had already had the measurements planned; for the lid angle I went with 35 degrees. Next task was the tedious job of setting the dado stack. It took me four test cuts to get an acceptable fit. The dado debacle cost me nearly thirty minutes of build time. I’m not watching the clock, mind you, but stuff like that I keep track of pretty closely. Once I had the dado stack set I got them cut. Rather than rip the board in half and cut the dados on each case side separately, I left the board intact and cut both at the same time. It was a bit more difficult dealing with a wide board at the table saw, but I also knew I would end up with perfectly matched dados. After that was finished I ripped the case sides to width and used the miter gauge to saw the lid angle. I sandwiched the two case sides together and sawed the angles simultaneously. That operation went more smoothly than I thought it would, and the end result was worth the extra effort. I would also like to mention that having a good miter gauge is essential to a cut like that. Last thing I had to do was reinstall the dado stack and cut the rabbets on the back of each case side. That was the most difficult of the operation because I probably should have cut the rabbets first and then sawn the angles. Still, I had it done fairly painlessly. I cleaned up the dados and rabbets with the router plane and the case sides were finished.
With that finished the next part of the build was simple, and that was making the shelves. I used the crosscut sled to cut them to length and then ripped them all to width, exactly 11 inches. That was a ridiculously easy task after the nervousness inducing job of getting the dados cut accurately. With the case parts all sawn and ready to go I proceeded to my least favorite activity in woodworking: sanding. I sanded all of the parts with a random orbit sander: course, medium, and fine; just like the good book says to do. That took around 30 minutes and I then proceeded to my other least favorite woodworking operation: glue up.
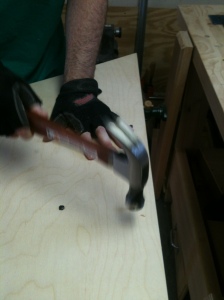
I had planned on gluing up the case sides in a traditional way, with clamps, but at the very last minute I decided to use cut nails on the chest. So I pre-drilled the holes from the inside of the case and attempted a symmetrical lay out, partly by measuring and partly by eye. I used the cut nails with the decorative head, though I at first was going to use regular cut nails and counter sink them, but something told me that the nails wanted to be seen. With the very reluctant help of my wife, it was hot as hell in the garage and she wanted no parts of it, I got the shelves installed, and I think the nails look pretty good, not to mention that they hold as well as any clamp. The more I use cut nails, the more I want to use them. But now that they are on the case, it has made me rethink painting it, and rather finishing it with linseed oil, and maybe wax all around. I’m still not at that point yet so I won’t worry about it for the time being.
Once the case was together I nearly called it a day, but I decided to put an extra 30 minutes in and finish the front trim pieces. For the trim I again went with clear pine. I had planned on using Poplar but the lumber yard where I picked it up informed me that they wouldn’t have any wide pieces available any time soon. That didn’t matter much for the front trim, but it did for the lid and front panel. I want to make both of those pieces using just two boards each. I don’t want to get saddled into a big panel glue up, so I went with the most readily available option.
For the bottom trim board I ripped it so it would stick up 1/2″ above the shelf, just high enough so it would keep things in place and at the same time not so high that tools would catch on it when they were being removed. For the top trim board I sawed the bevel angle first, using an angle gauge to get the proper line. I then placed the case on the ground, set the top trim board at the correct position, and marked the cut with a pencil. Once the board was ripped to width I sanded both trim pieces and turned to the tool that I use on every build, and the most important tool I own, the jack plane. The jack plane cleaned up any tool marks on the trim, and like always it did a great job. If anybody tells you to get a smooth plane as your first plane refer them to me and I will set the record straight: The Jack Plane kicks the smooth plane’s ass everyday of the week and twice on Sunday.
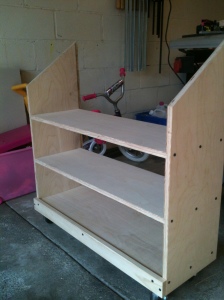
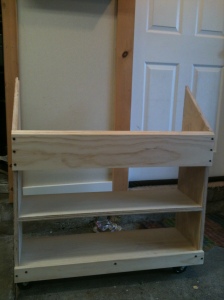
Last operation of the day was nailing the trim pieces to the case. I used glue on the top trim board but not on the bottom; I had a slight fear that I was going to split it, but thankfully I didn’t. Before I finished up I attached a couple of plywood cleats to the bottom of the chest for corner support and also for attaching the casters. I then decided to attach the casters immediately so I could easily roll the case out of the way and also keep it off the floor. The total time spent was just under four and a half hours. The good news is the bulk of the case is finished, and the other parts I can work on piece meal.
Now is time for a little honesty. With the case taking shape, I’m not all that impressed with it. Don’t get me wrong, I think it will do a great job holding all of my hand tools and then some, and I like the stock I chose, but the case itself looks like nothing more than a glorified tool cart. Maybe the proportions I am using are part of the problem, but I chose them for functionality and space constraints over visual appeal, though that isn’t saying that I just slapped it together; I did put a good amount of thought into the design and proportions. In any event, I like the look of the cut nails, and I think when the back panels are installed it will make the case appear much more solid and give it a more polished look. I’m doing my best to reserve judgment. Whatever the case may be, the build got off to a very good start.
Patriot’s Toolchest Design Ideas
The rare and even more unwanted combination of a sore back, a poor nights sleep, a pulled muscle in my shoulder, not feeling all that well, a hot and humid afternoon, and a long day at work did not leave me in the mood to woodwork this fine evening. In fact, it didn’t leave me in the mood to do much of anything. So when I finally did get home from work I promptly went into my garage and sharpened a few chisels just for the hell of it. I wasn’t being a glutton for punishment, or trying to prove my undying love of hobby woodworking, it was just to blow off a little steam, and also to get myself reacquainted with being at the workbench again, something I’ve found myself missing for about a week now.
Actually, my bad day did have a few bright spots, and one of them came during my break at work. I had planned on sitting comatose in our air conditioned break room for thirty minutes or so sipping iced tea and turning off my brain; instead my mind turned to my tool chest project that will hopefully begin this coming Sunday. I’ve had the basic idea/design in my head for some time actually, but it wasn’t until a few days ago that I actually did some drawings and came up with some measurements. Originally I had decided on a chest roughly 31″x31″x12″ deep. I think I will stick with the 12″ deep part, but I will make the height 32″ and the width 36″. Two things brought me to this conclusion, firstly I have decided to make the case body and shelves from birch plywood. Two 2×4 sheets will give me the sides, and the top and bottom shelves, and maybe most importantly, make the case much more stable in terms of warp. Secondly, the added height will give me just that much more room in the case, and since I have an area roughly three feet wide on the floor where the chest will go I think it would be foolish not to take advantage of it. As far as the trim, the back panels, and the lid are concerned, I’m leaning towards Poplar, but if Pine is more readily available (in as far as the quality of the boards) I will use it instead.
The joinery on the case will most likely be very simple. The shelves will be rabbeted and the back panels dadoed. I think I will use cut nails for the trim and also to help strengthen the shelving joints (and any other exposed area) while the back panels will be tongue and grooved together and simply screwed to the case. I had considered running the boards for the back of the case vertically but I believe that horizontal boards will not only look much nicer, they will also add to the stability of the case. For the lid I considered making a traditional raised panel and frame, but when I thought about it for a while it sounded less and less like a good idea, for no other reason than I don’t think it will look as nice as a single battened cover.
Besides a saw till, I’m really not sure what kind of tool holding I’m going to incorporate into the chest. Spacers for the hand planes will probably be a must, and a small rack for screw drivers and measuring tools. I’m still not sure if I will install a chisel rack or just leave them in the roll. I will cross that bridge when I get to it. Last thing is paint color. Everybody seems to like black, and for good reason. Black will probably take the most punishment and still look decent, but I can also see myself going with a dark green or red. Again, those are details that can thankfully wait.
So the good news is I have my measurements down, the material chosen, and the stock amounts all ready to go. I will start by picking up the case material and the trim for the front on Thursday, and hopefully on Sunday have a finished case. Until the case is constructed I don’t want to do much else. A lot can change between the theory phase of a project and the practical phase; that is why I don’t really like following woodworking plans. Woodworking plans look great on paper, but they cannot and do not account for everything. I’m going to estimate the build time at roughly twenty hours, though that can also change very quickly. Build time isn’t very important to me, but I like to know how long something takes. Maybe it’s a character flaw I have. Maybe I should just enjoy the process…No, enjoying the process is for other things, I woodwork to make stuff.


